 I keep asking myself to start blogging. However, I've never been able to find the time, or better yet, a good topic to write about. This was until I decided to analyze my workout activities.
I do make a point to exercise daily and I am using the iPhone's health App to store my activities. Since I've been doing it for quite while now, I've decided to see if I could use Microsoft's Power BI to import and analyze its content.
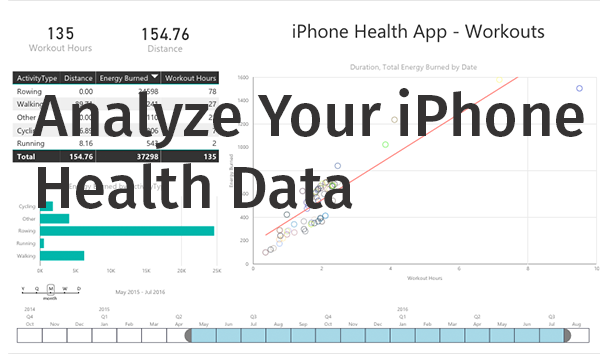
In this post, I will share with you the steps I took to export and load my workout activities into Power BI. Below I've embedded two of the reports I come with.
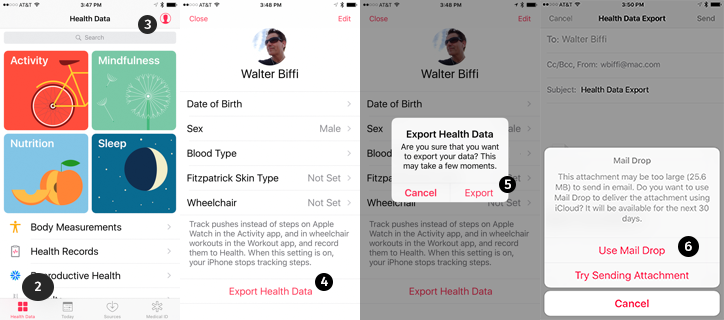
Export Health Data
I am showing it to you using the iOS 10. To get to the export specific to an older version of iOS, uses these steps instead.
- Launch the Health app on your iPhone.

- Tap on Health Data at the bottom left on the screen.
- Tap on the icon at the top right on the screen.
- Tap Export Health Data.
- Tap Export. It can take few moments to extract depending on the amount of data you have.
You will be better off email it to yourself using the Mail Drop.
Import Health Data to Power BI
I've used Power BI Desktop to do the heavy lifting, and once done, I published the reports to Power BI on the cloud.
If you do not have Power BI Desktop yet, you can downlod it for free from Microsoft. As of this writing it is only a windows product.
Since I want to keep this post lean and to the point, I am not outlining all the steps that I took to shape the data, and creating the reports. There are lots of tutorials out there that show how to do just that, and the logic can be applied to this data set also.
Unzip the Export file
The email that you received should contain a zip file. Download it to your computer. You can easily uncompress it by double clicking it.
You will find two XML files inside, export.xml and export_cda.xml. Extract the export.xml file to a location of your choosing.
Importing the Data
Open Power BI Desktop and follow these steps:
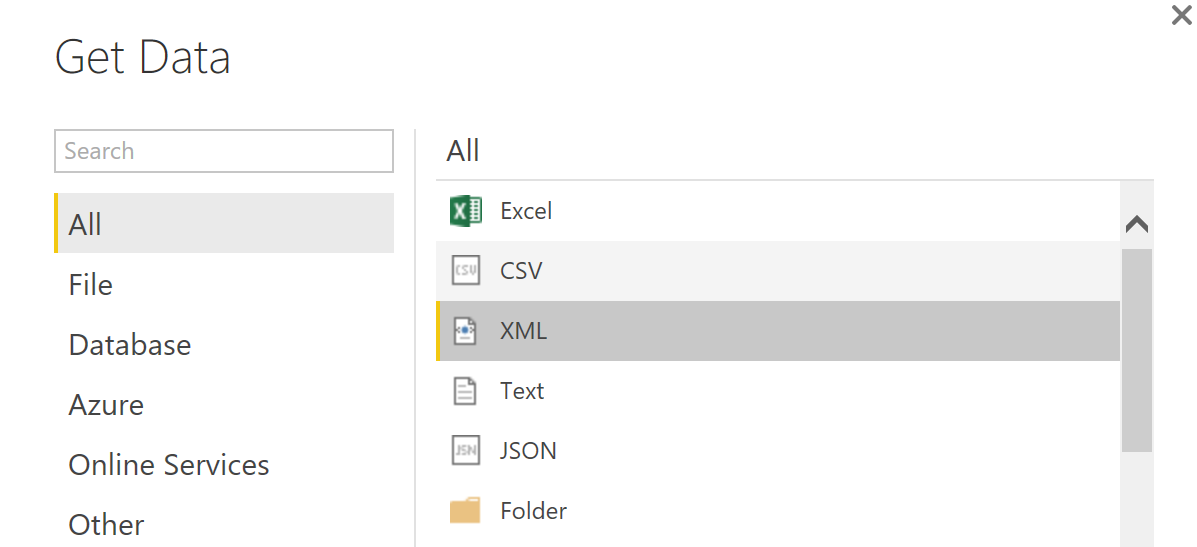
From the welcome screen click the Get Data icon.
From the upcoming modal window, under the All type, choose XML and click the connect button.
From the Open dialog window, navigate to where you stored the export.xml file, select it and click the Open button.
The table shown below will be loaded into the Query Editor.

As you can see all the cell but one contain a table.
- Clicking on the
Tablename it retrieves the data contained within that cell. - Click on the
iconto the right of each cell. It brings forward a dialog box like the one shown below. This dialog allows you to choose the columns you want to work with.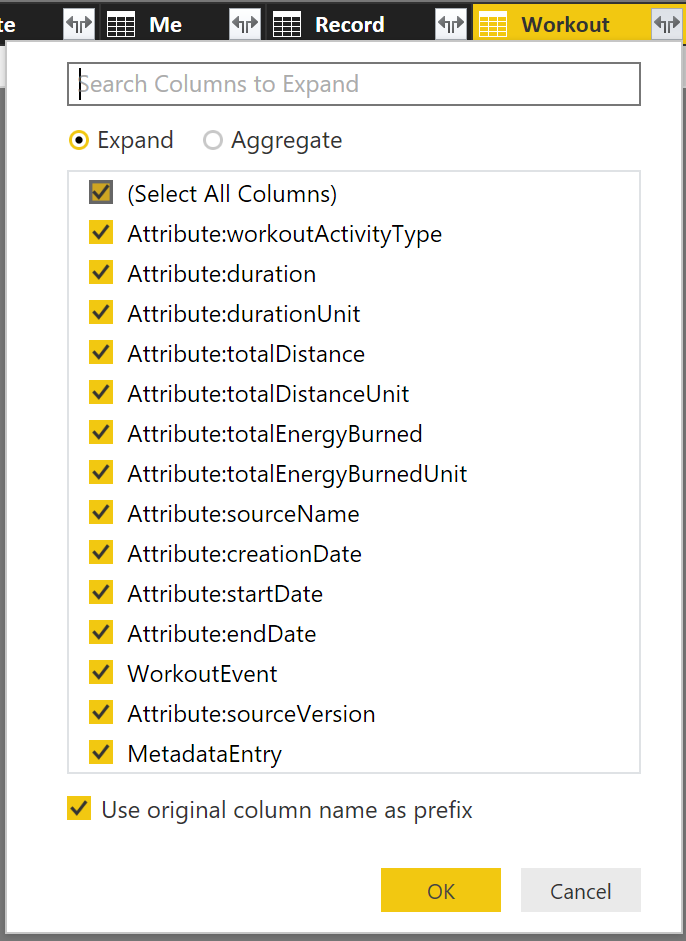
- Clicking on the
For my exercise I am using the Workout and the ActivitySummary data sets. And from each table set I am only using few columns. In addition, I made sure to convert the data type for the columns when needed and renamed the columns accordingly to my liking.
Below are two of the reports I come up with. You should be able to interact with them. For example, filtering on a particular date period the visual will update accordingly.
I hope you find this post helpful. If you decide to give it a try, I wish you success on analyzing your workout activities.